Phone Repairability Basics
Long-term repairability means your phone stays serviceable across years, not just days after purchase. Repairability depends on more than whether a screen or battery is “replaceable”; it also depends on access to parts, repair documentation, and whether software features block diagnostics or component swaps.
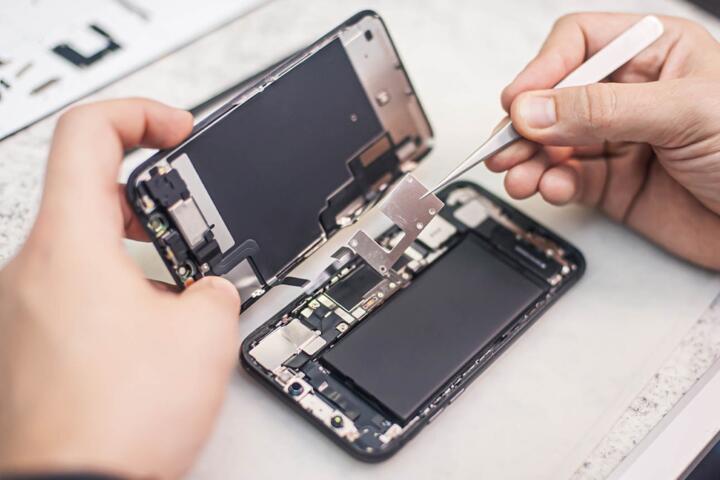
Practical examples show up fast. A cracked display often needs a compatible digitizer and adhesive, while a battery replacement requires correct calibration and safe handling of charging circuits. If the phone uses a fingerprint sensor integrated into the display assembly, a repair that swaps only the glass can fail verification or break biometrics. When you plan ahead, you reduce the chance that a repair becomes a data-loss event or a months-long waiting period for parts.
Repairability also interacts with software. Some devices restrict booting or hardware checks after certain component changes, which can turn a simple fix into a “service-only” workflow. You can’t remove those constraints from your side, but you can prepare so the repair shop has the information it needs and you have a fallback plan for your data.
Common Barriers And Mistakes
People often treat repairability as a hardware-only question, then get surprised by software and policy constraints. A phone may accept a new battery physically, yet still require a calibration step or a service procedure tied to the device’s internal state. A screen replacement may work visually but fail touch accuracy if the digitizer stack is mismatched.
Another frequent mistake is skipping documentation. Without the device model, storage size, and region code, you can end up ordering the wrong part revision. Even within the same model name, vendors ship variants with different modem bands, display suppliers, or sensor layouts. I’ve seen repair delays happen because the part listing matched “Model A” but not the exact “Model A (Region B)” identifier.
Supporting technologies also matter. Repair shops rely on diagnostic tools, firmware packages, and sometimes manufacturer authorization. If the phone’s boot state is locked or the device is tied to an account, the shop may need extra steps before it can test sensors or restore factory settings. In some cases, a repair requires the device to be in a specific software version to run the correct service workflow, and that version mismatch rarely shows up in consumer-facing guides.
Finally, many people underestimate how quickly data becomes the real risk. A repair that involves the logic board, secure elements, or storage replacement can trigger encryption changes. If you haven’t backed up recently, the “repair” becomes a recovery project. If you have backed up, the repair becomes a restore project, which is usually faster.
Prepare Your Phone Before Repair
Back Up With Verification
Back up data before any repair attempt, then verify the backup actually restores. Use the phone’s built-in backup method and then confirm you can sign in and open key apps after a restore test. For example, if you rely on cloud backup, check that photos and contacts show the expected counts after a restore. If you use a computer backup, confirm the backup timestamp and that the backup includes app data you care about.
Keep a short “recovery checklist” in your notes: account email, two-factor authentication method, and the last known working passcode. If your phone supports device encryption, the passcode becomes the gate to your own data. A repair shop can’t bypass that without the correct credentials, and attempts to do so can permanently lock you out.
As a minor aside, I’ve found that people trust the backup icon but skip the restore verification step; the restore test catches missing permissions and stale credentials. On one device I reviewed (iOS 17.x, backup enabled), the backup succeeded but app data didn’t restore because the app had a local-only setting. That mismatch only surfaced after a restore.
Record Identifiers And Settings
Write down the exact device identifiers that help match parts and service instructions. Capture the model number from the device settings, the storage size, and the region or carrier variant if shown. Also record the serial number and IMEI/MEID for your records. If you plan to use a repair provider later, these details reduce back-and-forth and help confirm compatibility.
Before repairs, take screenshots of key settings: display resolution settings, accessibility options, and biometric enrollment status. If a repair affects sensors, you may need to re-enroll fingerprints or face unlock. Record which accounts are signed in so you can remove or re-add them after service.
For Android devices, note the build number and Android version shown in “About phone.” Some service workflows depend on the software build, and a shop may ask for it. For iPhone models, note the iOS version as well. A version mismatch can matter when a repair tool expects a specific firmware package.
Manage Account Locks And Security
Account locks can block a repair from completing tests. Remove the device from account-based security features when the manufacturer’s process allows it. For Apple devices, that typically means signing out of iCloud and removing the device from Find My before service; for Android, it often means removing the Google account and disabling relevant protection features through the device’s settings. The exact steps vary by OS version, so follow the manufacturer’s official instructions for your model.
Also check whether the phone is using a screen lock and whether you can unlock it reliably. If you use a passcode, confirm you know it and that it works after a reboot. If you use biometrics, confirm you can still unlock with the fallback method. Repair shops may need to boot the phone into diagnostic modes, and a failed unlock attempt can delay the job.
Security features protect your data, but they also create friction for repairs. Planning reduces friction: sign out, back up, and keep credentials accessible in a safe place.
Choose Parts And Service Paths
Decide how you want repairs to be handled: manufacturer service, authorized service, or independent repair. Manufacturer and authorized channels often have access to official parts and service documentation, but they may cost more and take longer depending on availability. Independent shops may be faster for common repairs like screens, yet part compatibility can vary by supplier.
Ask the repair provider what parts they use and whether they test functionality after installation. For example, a display repair should include checks for touch response, brightness control, proximity sensor behavior (if integrated), and camera performance if the display assembly includes it. For battery repairs, ask whether they run a battery health calibration or a service procedure required by the device.
When you request a repair, ask whether the provider can keep your data intact. Some repairs are “data-safe” when they avoid storage replacement, while others can trigger a factory reset. Realistic outcomes depend on the repair scope, and the provider should state the risk in plain terms.
Case Examples For Planning
Cracked Display With Biometric Ties
An anonymized scenario: a person with a recent flagship phone cracks the display and notices the fingerprint sensor stops working after a previous repair attempt. The shop used a compatible-looking display assembly, but the biometric module required a specific pairing or calibration step. The owner prepared for the next repair by backing up, signing out of account security, and recording the exact model number and iOS/Android build. The second repair used a display assembly matched to the device variant, and the shop re-enrolled biometrics after installation. Downtime stayed limited because the backup and account removal steps were done before the appointment.
Battery Replacement After Long Storage
An anonymized scenario: a person stores a phone for months, then finds the battery drains quickly and the device shuts down under load. They schedule a battery replacement but realize the phone’s passcode is forgotten. The repair provider cannot proceed without unlocking, and the owner must recover access through the account recovery flow, which takes time. In the next attempt, the owner updated the backup, confirmed the passcode, and documented the device identifiers. The battery repair then proceeded with fewer delays because the shop could test charging behavior immediately after service.
Repairability Checklist And Trade-offs
| Decision Point | What To Check | Upside | Risk Or Cost |
|---|---|---|---|
| Service Channel | Manufacturer/authorized vs independent; ask about parts sourcing | Authorized channels often have official parts and service tools | Higher cost or longer wait; independent parts may vary |
| Data Risk | Ask whether storage is touched; confirm backup/restore plan | Clear plan reduces downtime and recovery stress | Some repairs can trigger resets or encryption changes |
| Compatibility | Exact model/variant; ask about display and sensor pairing | Fewer “works but not fully” outcomes | Wrong revision causes touch, camera, or biometric issues |
| Post-Repair Testing | Touch, sensors, charging, biometrics; request a test checklist | Early detection prevents repeat visits | Some issues show up after a day of use |
Step-by-step checklist you can use before dropping the phone off:
- Back up, then restore-test one key item (photos or contacts) so you know the backup is real.
- Record model number, serial number, and IMEI/MEID in a note or document.
- Sign out of account security features using the official steps for your OS version.
- Confirm you know the passcode and that biometrics have a fallback unlock method.
- Ask the repair provider what parts revision they will use and whether they run post-repair diagnostics.
- Plan for re-enrollment of biometrics and re-login to accounts after service.
Common Mistakes To Avoid
One mistake is ordering parts based on a generic model name. “Same model” can still mean different display suppliers, sensor layouts, or region variants. If you buy parts yourself, match the exact model number and revision shown in device settings or on the original packaging.
Another mistake is skipping account security removal. If the device remains tied to account protection, the repair provider may refuse service or the device may fail activation after repair. That failure often looks like a software problem, but it originates from account state.
People also underestimate adhesive and sealing. A screen replacement that doesn’t restore proper sealing can lead to dust ingress or moisture damage later, which then turns a repair into a second repair. Even when the phone “works,” the long-term outcome depends on whether the repair restores the physical integrity of the enclosure.
Finally, avoid assuming that a “compatible” part behaves the same. Some components trigger calibration steps or verification checks. If the provider can’t explain what they test after installation, you may end up with a phone that passes basic checks but fails under specific conditions like low brightness, proximity events, or camera autofocus.
FAQ
What Should I Back Up First?
Back up contacts, photos, and any app data you cannot easily recreate. Then verify by restoring at least one category (for example, contacts) so you confirm the backup includes the data you rely on.
Do Account Locks Block Repairs?
Account security features can block activation or diagnostic workflows. Sign out and remove the device from the relevant protection service using the official steps for your OS version before the repair appointment.
Will A Screen Repair Affect Biometrics?
Some phones tie fingerprint or face sensors to the display assembly or require re-enrollment after replacement. Ask the repair provider whether the sensor is integrated and what post-repair steps they perform.
How Do I Match The Right Parts?
Use the exact model number, storage size, and region/carrier variant shown in device settings. Part listings that only match a marketing name often mismatch revisions.
What Tests Should A Repair Include?
Request checks for touch response, brightness control, proximity sensor behavior, charging stability, and camera performance. For battery work, ask about battery health calibration or the device’s required service procedure.
Author's Insight
Long-term repairability depends on the interaction between physical parts, device identifiers, and software state. Planning reduces delays because it removes account lock friction and gives the repair provider the exact variant details needed for compatibility. Data safety matters because some repairs touch storage or trigger encryption changes, so backup verification beats “backup enabled” as a confidence signal.
When evidence is uncertain, the safest approach is to ask the repair provider for a clear scope statement: what parts they will replace, whether they touch storage, and what post-repair tests they run. That level of specificity turns repairability from a hope into a measurable process.
Key Takeaways
- Repairability is not only hardware; software state and account security can block or complicate service.
- Back up and verify restore behavior before any repair appointment.
- Record exact device identifiers and OS version so parts and service workflows match your variant.
- Ask what the repair provider tests after installation, especially for sensors and charging.
- Avoid generic part matching and account lock oversights; both cause repeat visits and longer downtime.